
Step 1
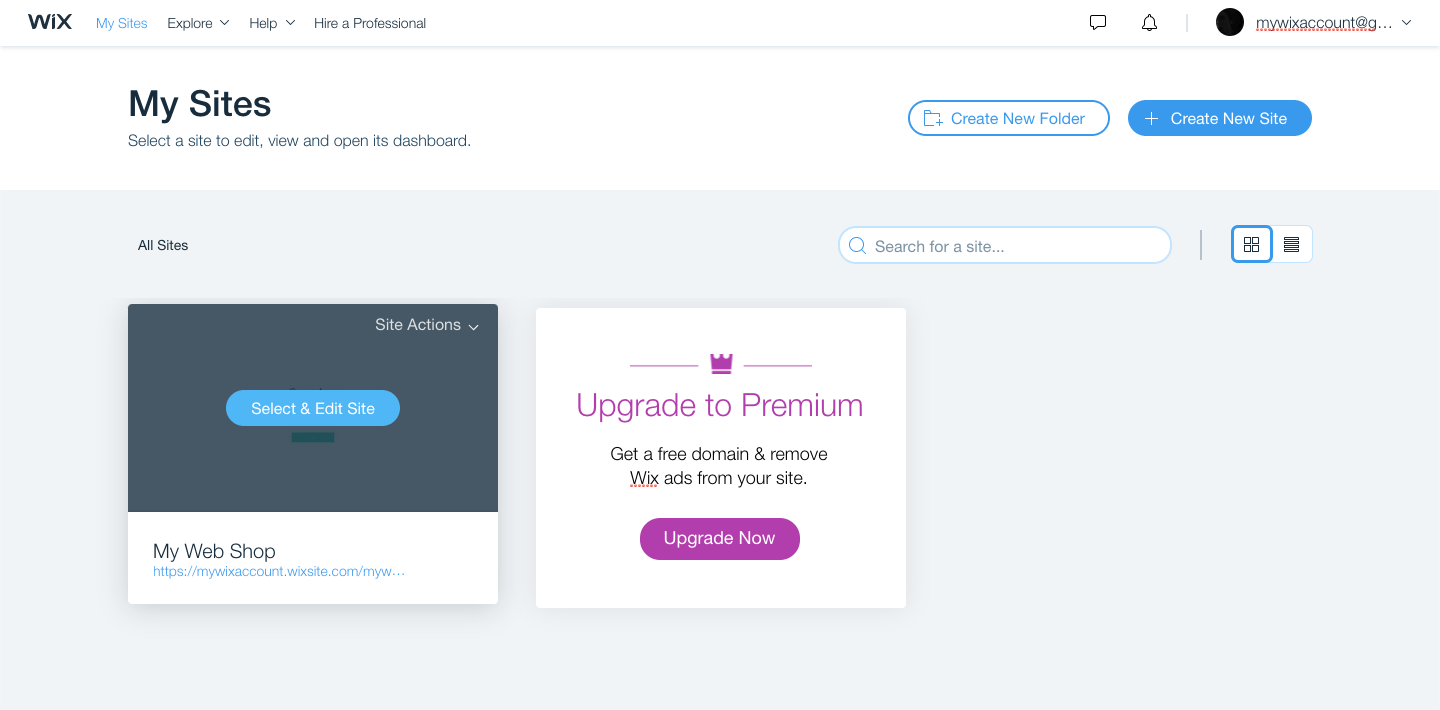
Log in to your Wix account. In your Wix dashboard, click My Sites
on the top left and select the site where you want to integrate the
chat. If you only have one site, you will already see it on the home
screen of your Dashboard.
Step 2
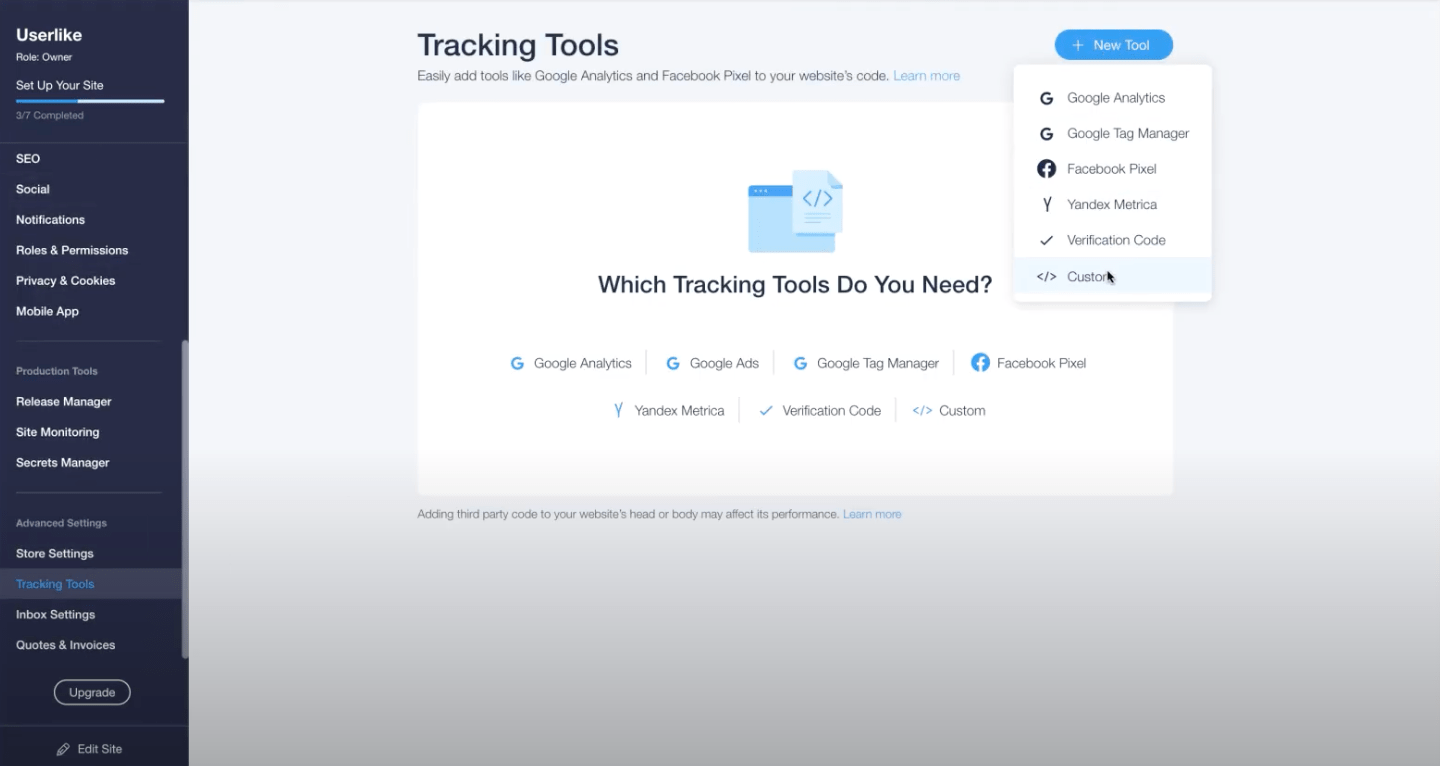
Go to Settings in the menu to the left, then scroll down to the Tracking Tools section. Click on New Tool and create a Custom object.
Step 3
Copy your Lime Connect Widget code.
Find the unique Widget code under
Channels > Website Widgets > Select a Widget > Install > JavaScript Widget code
javascript<script type="text/javascript" async src="https://userlike-cdn-widgets.s3-eu-west-1.amazonaws.com/0311e734d84c528de0eXXe40471bf66734d7XX8079b994309a18XXXXXaa79fe910.js"></script>
To avoid CSS conflicts with the chat client, we advise you not to use
iframe { !important } in your CSS. Better be more specific and exclude the Lime Connect chat client by using iframe:not(.userlike) { !important }.To find another Widget’s code, go to the Widget overview, click a Widget’s name to open its settings, then go to Install > JavaScript Widget code.
Step 4
Paste your Lime Connect Widget code into the top box and
give your script a name so you can easily find it later. Select All Pages and keep the Load code once option in place. Under the Place Code in option select Body - end.
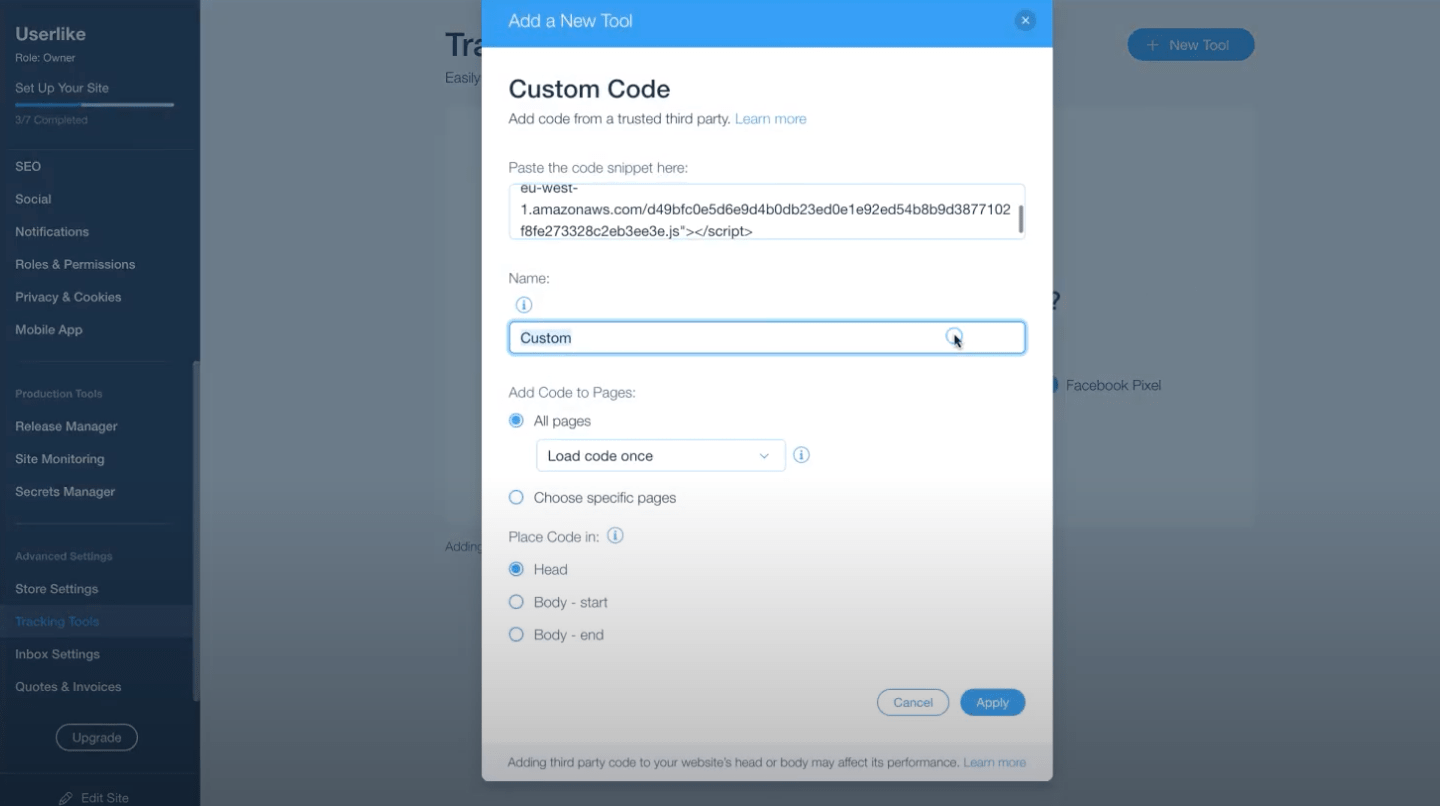
Click on Apply to complete the setup. Your Lime Connect chat is now integrated and visible on your Wix site.
Start chatting
To start chatting with your visitors, log in to the Lime Connect Message Center, set yourself to online – and chat away!