

Use the “brain” icon in the left-hand menu to open the knowledge base.
In your Explorer, you can quickly and easily build a folder structure for your documents, files, and web pages. Your AI Agents and AI Copilot then use this content as their source of knowledge.
Use the blue button to add different types of items:
- Folders
- Files
- Web pages
- Text files
The entire knowledge base is limited to 3,000 items per organization. This includes files, text files, and individual URLs from a website sync.
Disclaimer! The quality of your data is crucial! If you provide the AI with poor-quality information, you will get poor-quality results in return, following the principle of “garbage in, garbage out”.
Building a structure
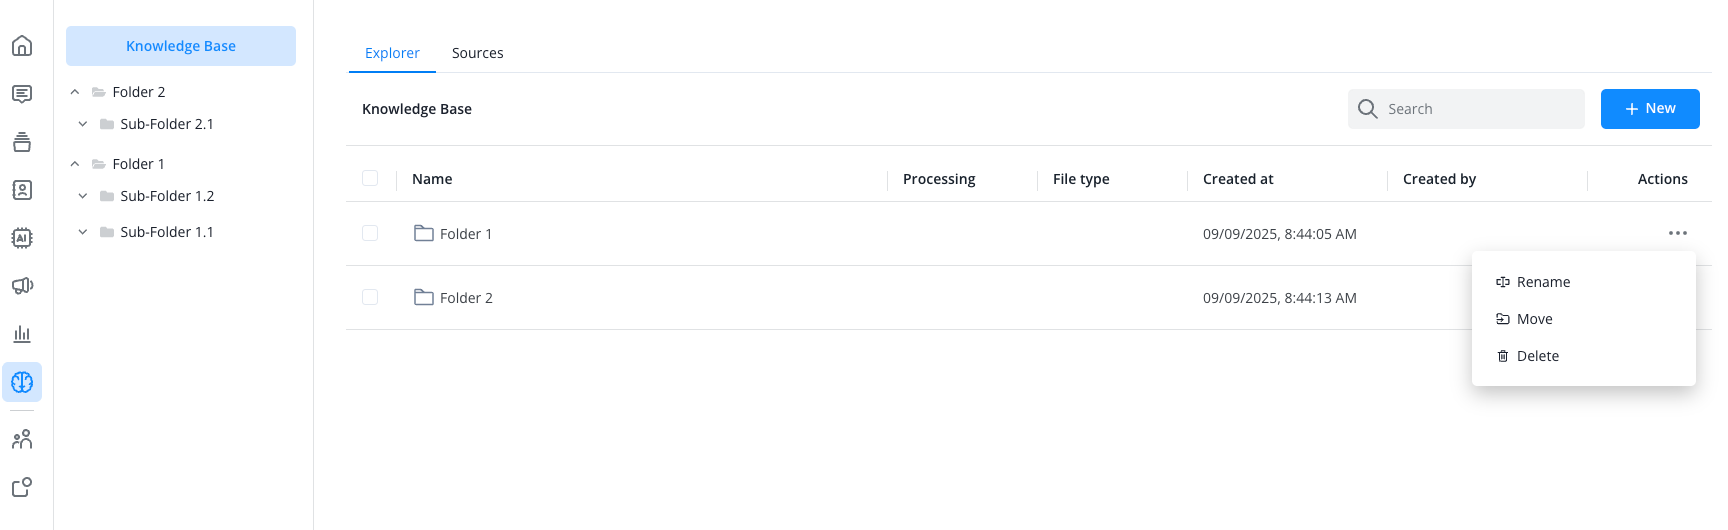
Use folders to organize and sort your knowledge content clearly. You can also use subfolders.
Created folders appear in the overview on the left, where you can expand and collapse them. In the detail view on the right, use the three-dot menu to rename, move, or delete folders.
Uploading a file
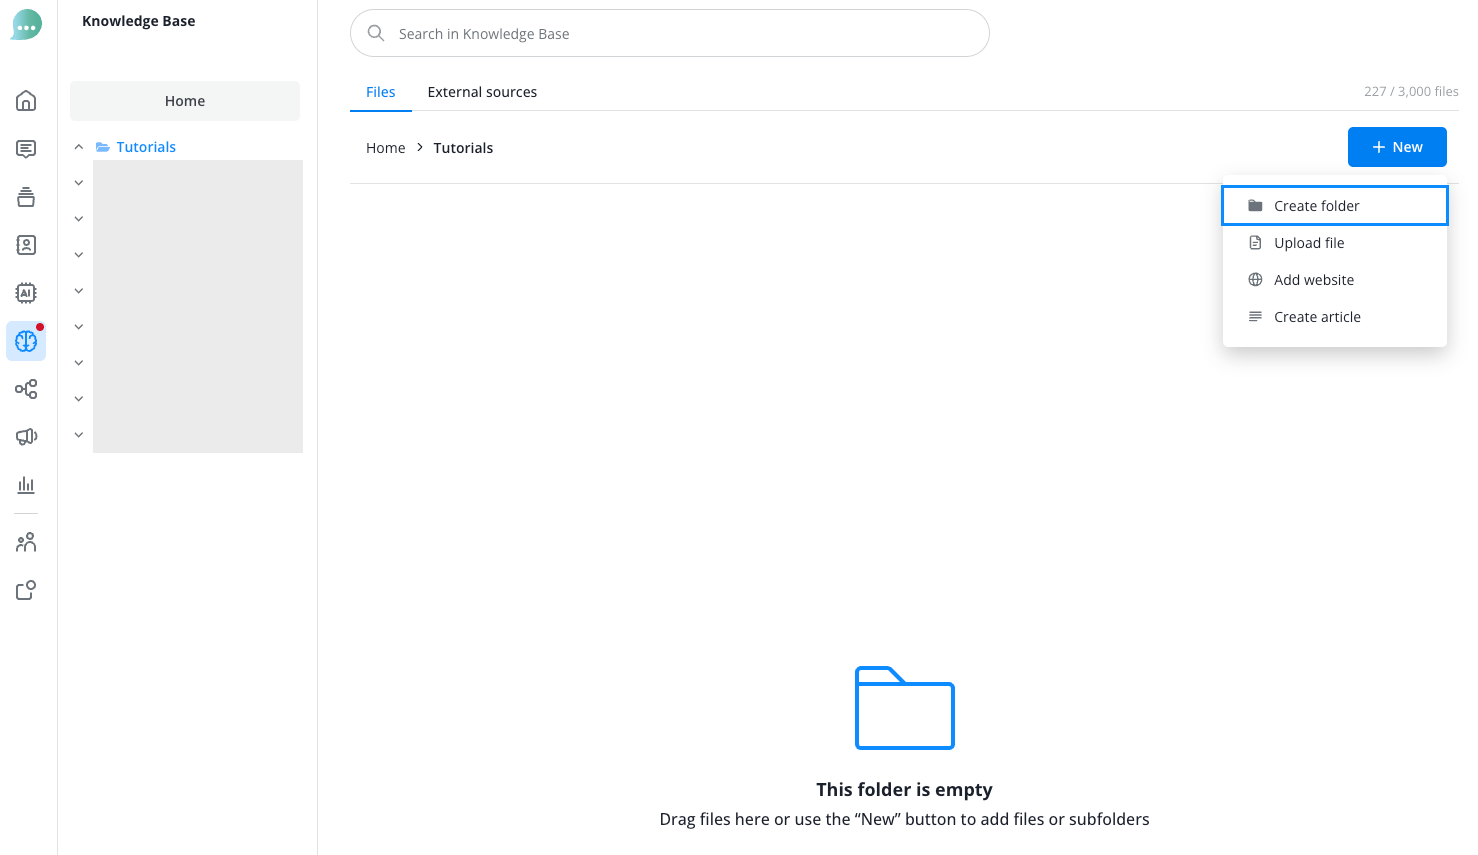
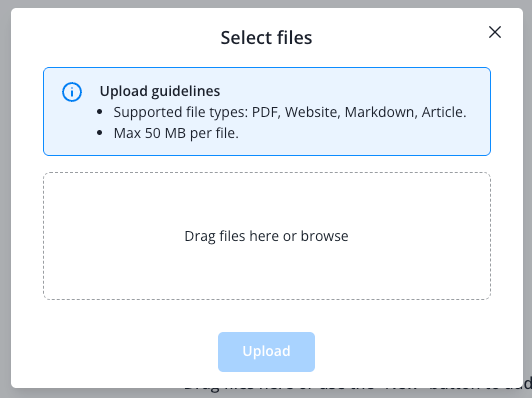
You can upload PDF, text, Markdown, and HTML files to your knowledge base. To do so, click "New" and select "Upload document".
Select the file and then upload it.
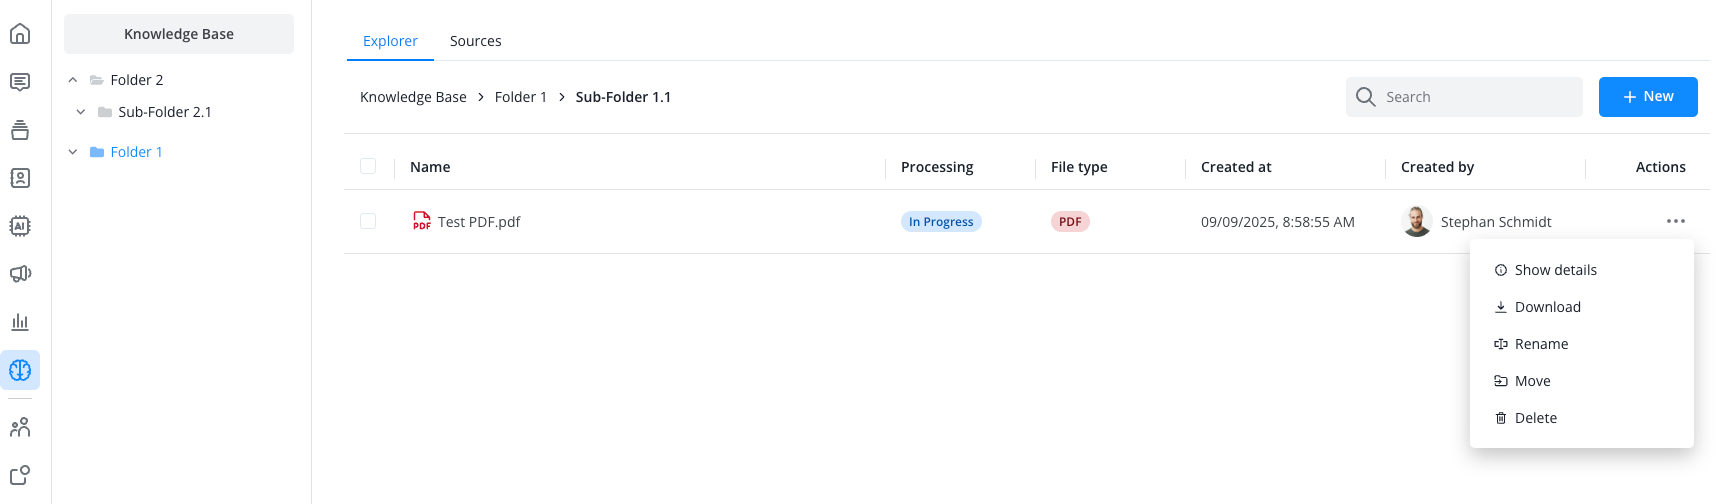
The file then appears in the folder overview:
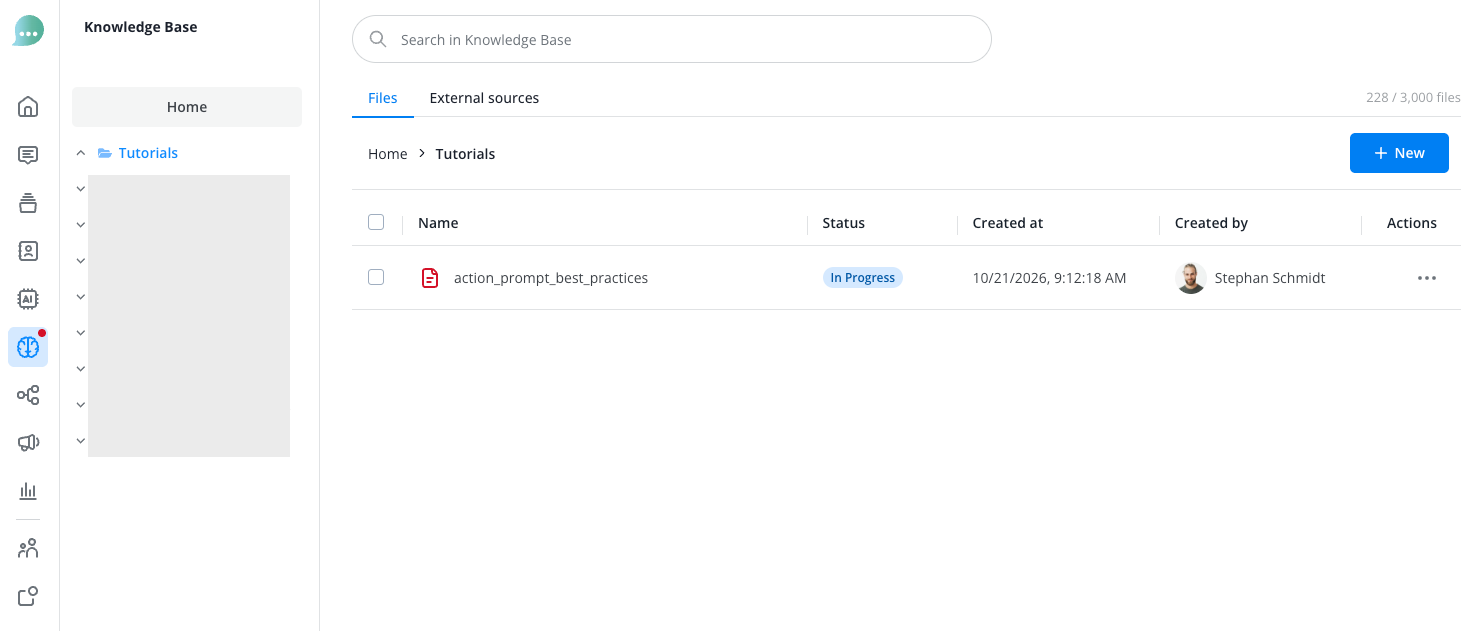
Here you can also see the file’s current processing status. Hover over the status to learn more.
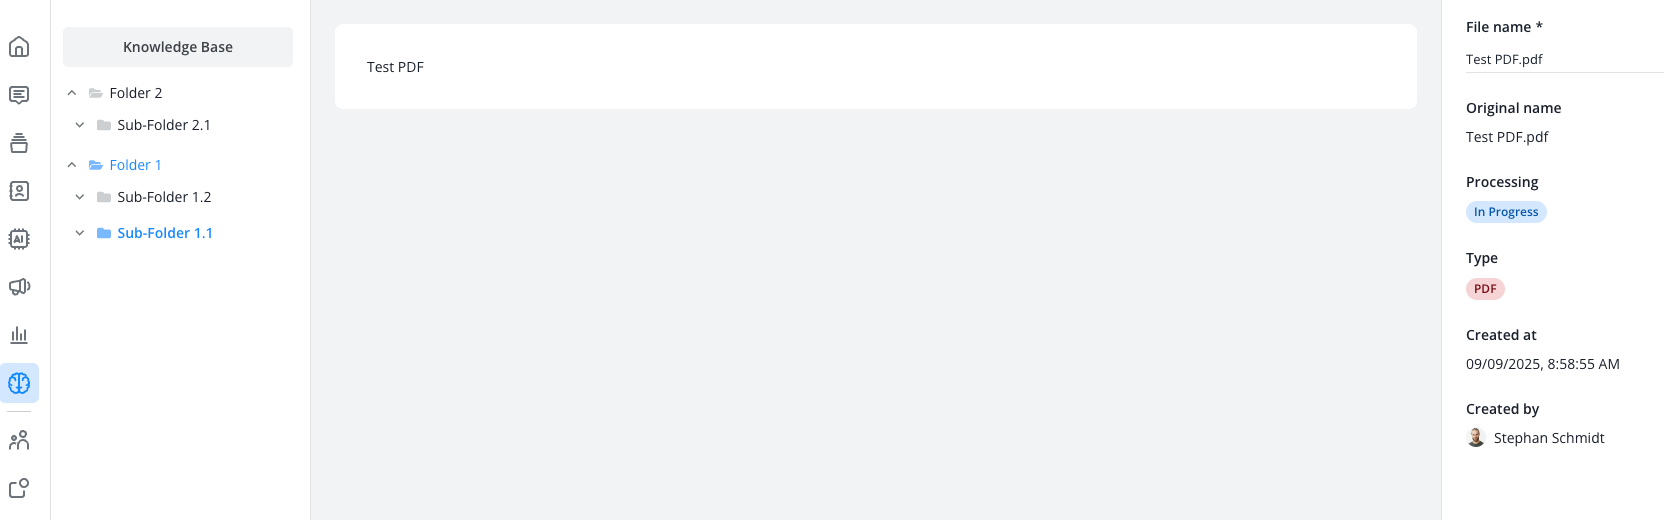
Click the file name or the three-dot menu to open the detail view and see which content has been captured in the knowledge base:
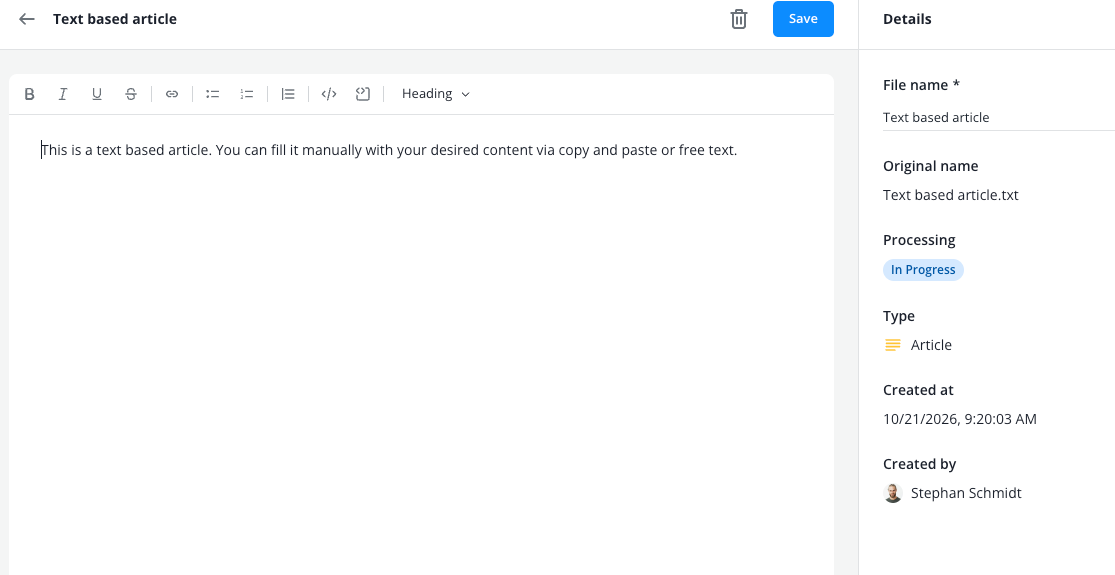
You can also create an article directly in your browser and fill it with your desired content by copying and pasting or typing freely. To do so, click "New" and select "Create article". Give the article a name, add the text, and save it.
The article also appears in the folder overview and can be opened in the detail view:
Editing content later
You can use the three-dot menu to move content to other folders at any time.
Text files as well as uploaded .txt or .md files can be edited later, whereas uploaded files of other formats do not offer this option.
You can also download previously uploaded files again or rename them.
How do I limit when the AI uses an item?
Set an availability period for content that the AI should only use for a limited time, for example a seasonal offer. Outside the period, your AI Agents and AI Copilot no longer use the item to answer. The item stays in your knowledge base and nothing is deleted.
An availability period works per item and is separate from the folder access described under "Access for AI tools": access decides which folders an action may search, the period decides when an item may be used.
You need write permission for the knowledge base to change a period. Without it, you can only see the state of an item.
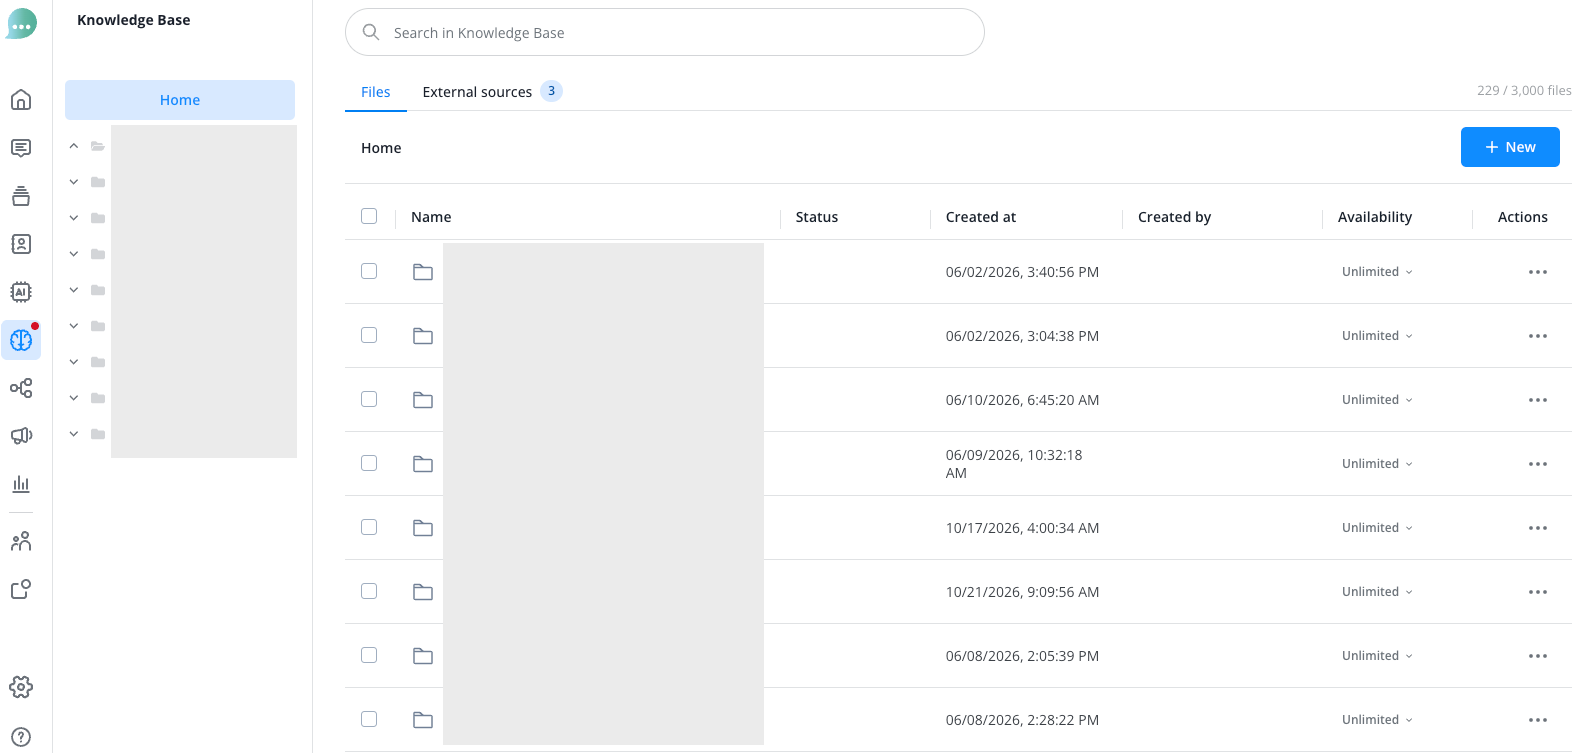
You can set a period for folders, files, and articles. The "Availability" column in the folder overview shows the state of each item. Hover over the state to see the dates, or click it to change them.
- Unlimited: no period is set, so the AI can always use the item.
- Limited: a period is set and is running now, so the AI can use the item.
- Upcoming: the period has not started yet, so the AI cannot use the item.
- Expired: the period has ended, so the AI cannot use the item.
Click the state of an item to open the "Set availability" dialog. Under "Availability period", select "Date range". Then choose a start date and time, an end date and time, or both. Leave one empty if the period has no start or no end. Click "Save". All times are in your organization's timezone, which is shown in the dialog.
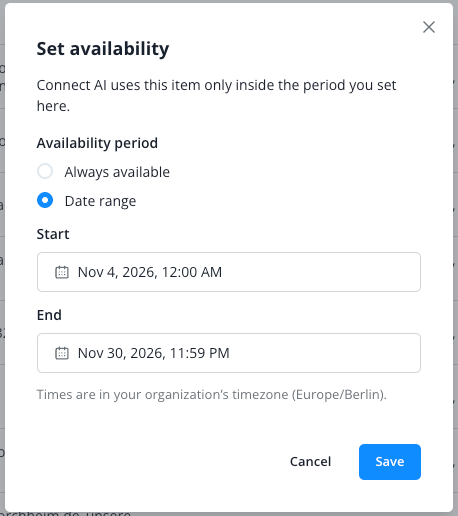
To remove a period, open the same dialog, select "Always available", and click "Save".
To change several items at once, tick them in the overview. Be aware that saving replaces the period on every selected item. Then click the calendar icon "Set availability" in the toolbar and save. You can also set a period in the side panel of the detail view of a file or article. There, click "Save" at the end, like for any other change to the item.
A folder's period applies to everything inside it, including subfolders. The items inside show their state too, for example "Limited" while the folder's period is running. An item with its own period is used only while its own period and its folder's period are both active. So an item cannot outlast its folder. Example: the folder is available from January to March and an item in it from February to April. The AI uses the item from February to March. When a folder limits an item, the dialog of the item names the folder. If the two periods do not overlap, the item is never available.
In the search of your knowledge base, you can filter the results by "Availability" to find, for example, all expired items. The filter offers the four states above.
Adding sources
Switch to the “External sources” tab to have the AI automatically upload and process entire website structures. This is the easiest way to add large amounts of data to your knowledge base in a short time.
For successful website crawling, keep the following requirements in mind:
- The website should have a sitemap (usually at domain.com/sitemap.xml) listing all important pages.
- The website should have a logical structure with clear navigation levels.
- Make sure that no robots.txt restrictions prevent crawling.
- Dynamic content loaded through JavaScript may not be fully captured. If the content of a source looks incomplete, switch on advanced fetching for it (see "Advanced crawling" below).
- Password-protected areas need to be considered separately.
- For the best performance, we recommend:
- A clear URL structure without duplicates caused by parameters.
- Well-organized content without too many redirects.
- Allowing enough time for large websites.
- If you need our crawlers’ IP addresses for allowlisting, please contact support@lime-connect.com. These cover our crawler only. Two kinds of request come from IP addresses we do not control, so an IP allowlist cannot let them through: when a source includes sub-pages and no "Sitemap URL" is entered, a third-party service lists the site's pages at every sync, and the web pages of a source with advanced fetching switched on are fetched through rotating IP addresses. PDF files are always fetched from our own IP addresses.
Click the blue button to add a new website source. Enter the URL and choose whether to include subpages.
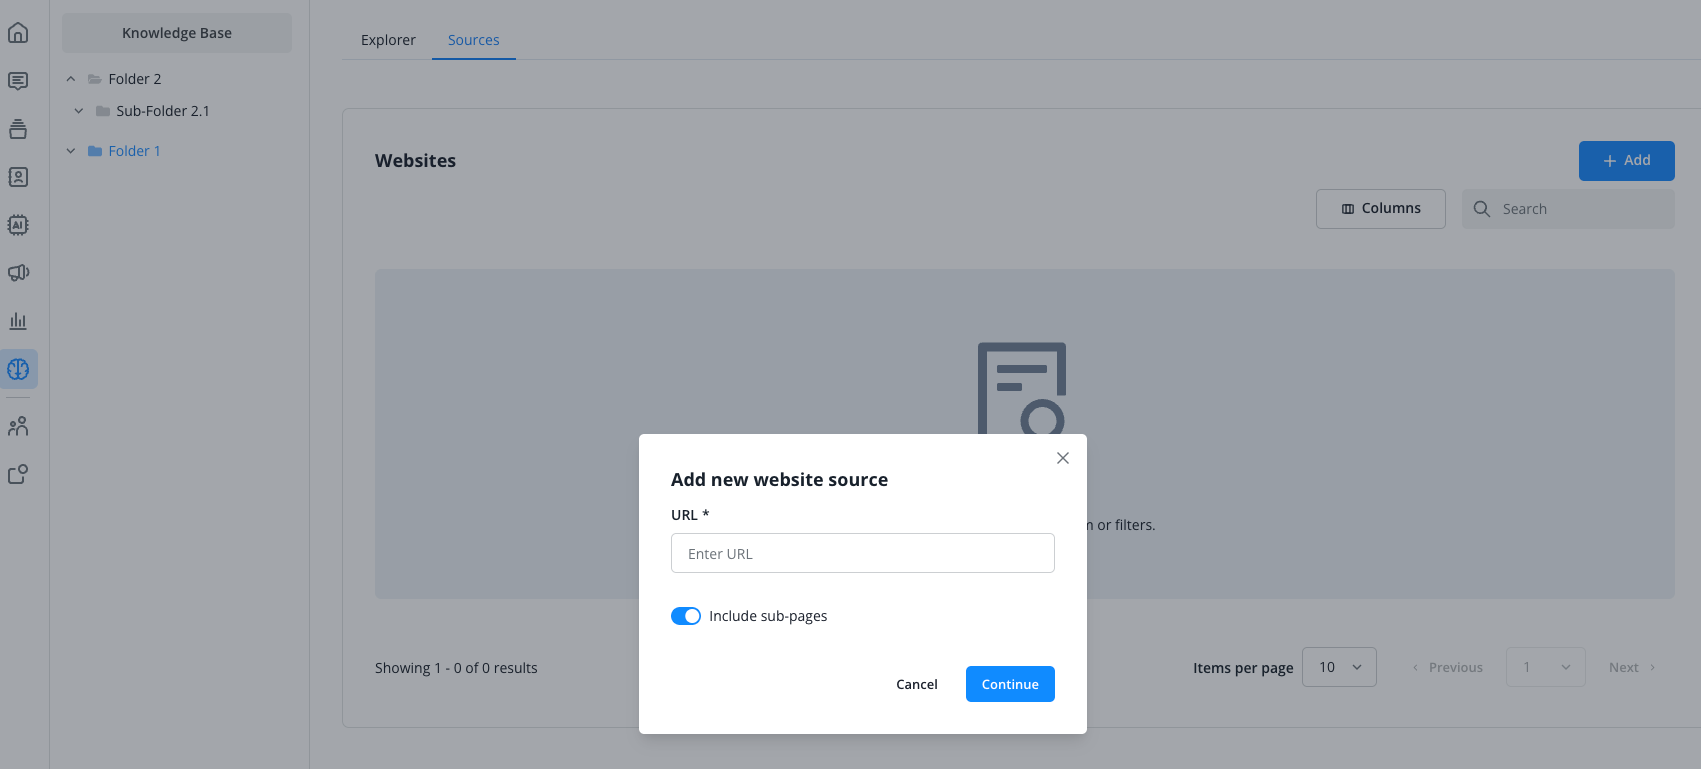
Once our system has captured the website and any included subpages, confirm on the next page which of the captured pages you want to use for the knowledge base. Select all pages or individual pages for the final upload. Then click “Start import” in the bottom-right corner.
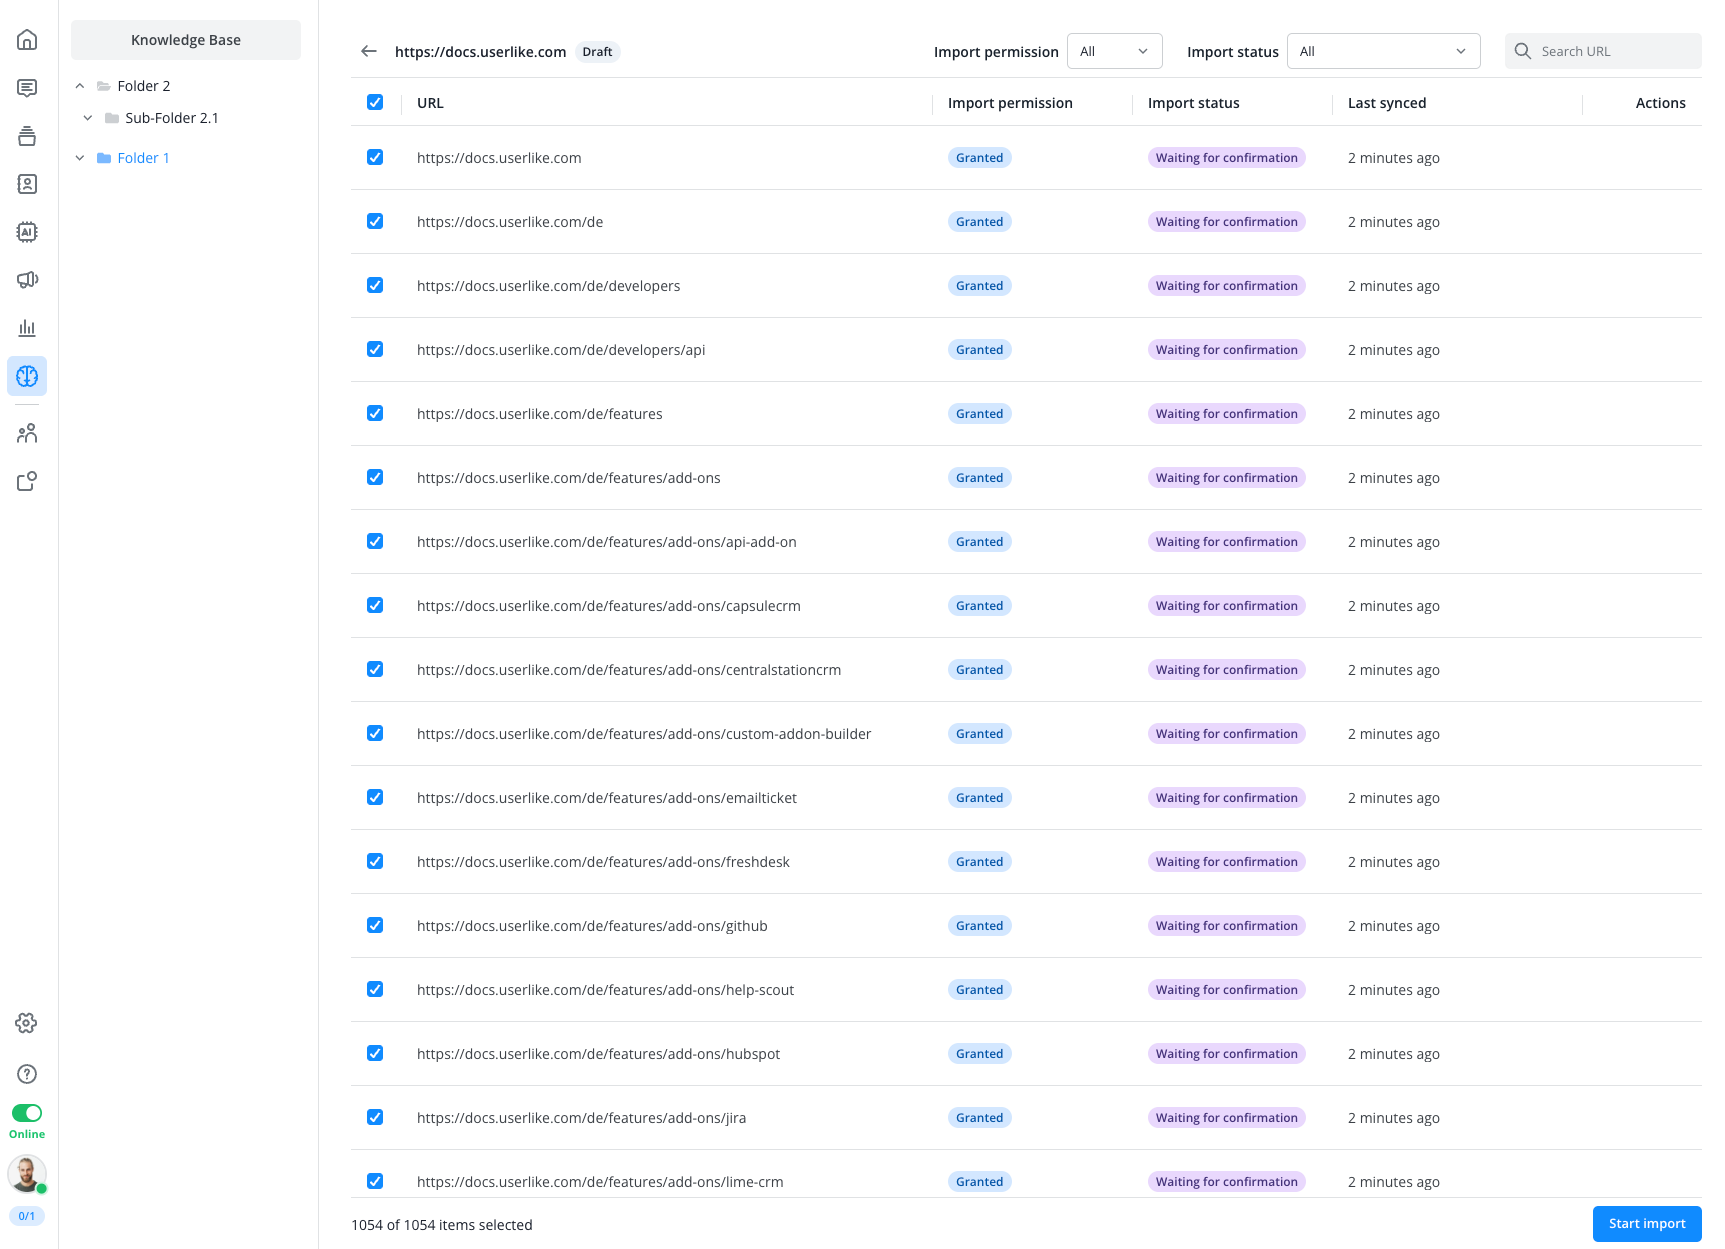
If you select more pages than your knowledge base has room for, a message tells you how many can still be used, for example "2 URLs were selected for activation but only 1 can be activated". Everything in your knowledge base counts toward the limit of 3,000 items: uploaded files, articles and imported pages, including pages whose sync you switched off but whose files you chose to keep.
You can now watch the status of each page change in real time until all pages have been imported and processed by the AI.
Depending on the size of the website, importing and processing the data may take some time.
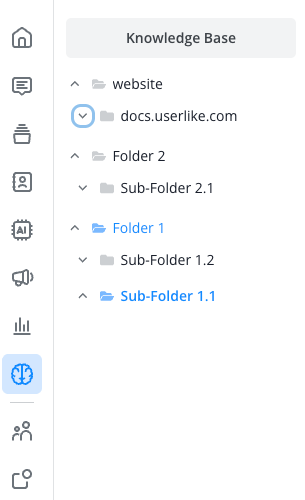
Once the import has started, the website source also appears as its own folder in the left-hand column.
Access for AI tools
You can give both AI tools—Agent and Copilot—access to the entire knowledge base or restrict access to a specific section (folder). This makes it easy to run multiple agents covering different topics, for example.
The System Actions already include entries we have provided for AI Agents and Copilots to access your entire knowledge base.
You can also use the blue “+ Add” button to set up specific access permissions for individual folders in your knowledge base.
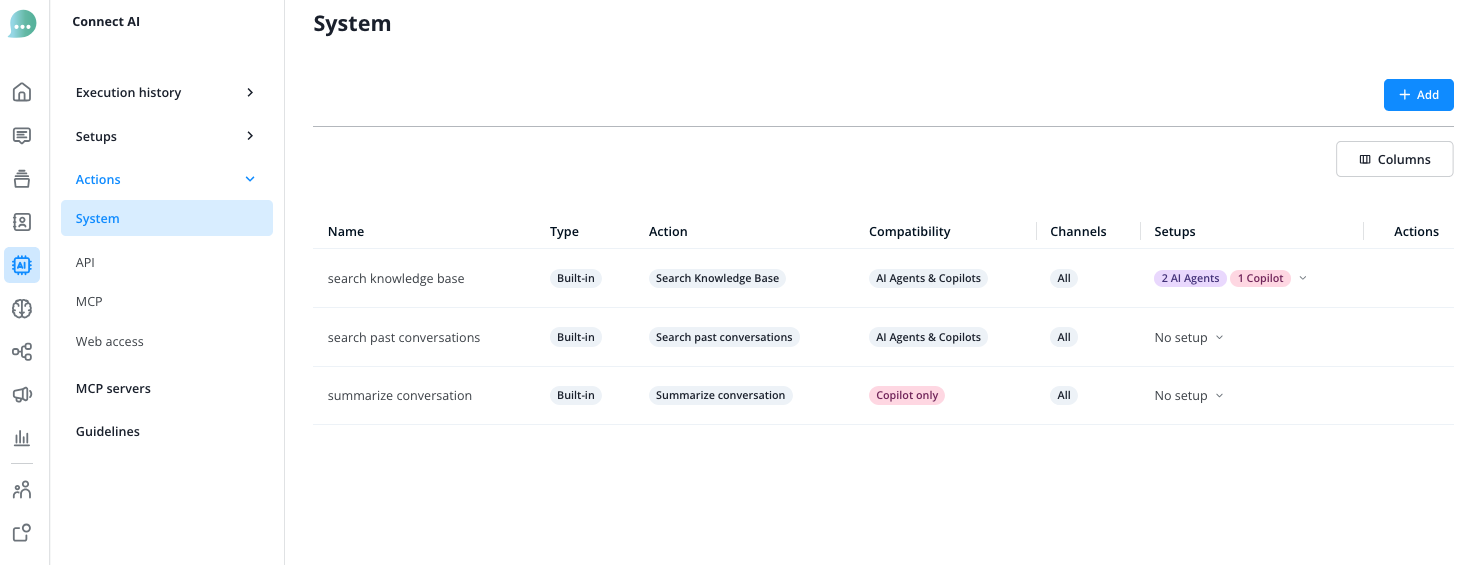
To do this, use the action for searching the knowledge base.
Assign an internal name and define when and how this action should be executed. Finally, assign access permissions for the desired folders.
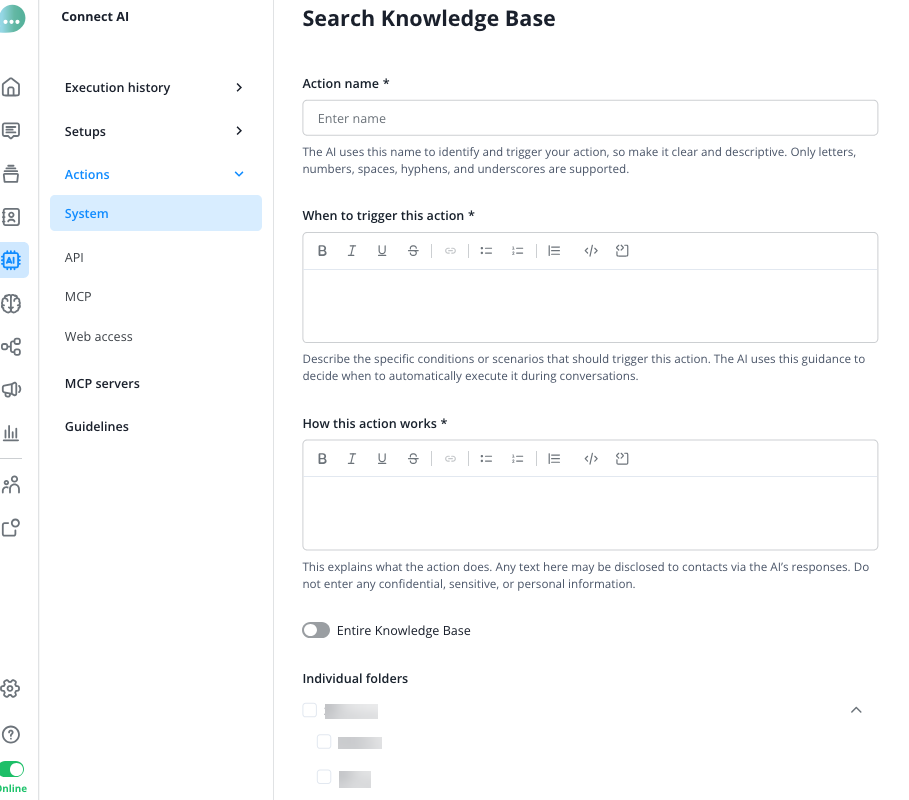
Advanced crawling
Some websites only show their content after JavaScript has run, so standard fetching captures them incompletely. For such a source, switch on advanced fetching: dynamic pages are then fetched with increased accuracy. You need write permission for the knowledge base to switch it on or off.
Open the "External sources" tab and click the website source to open its detail page. Next to the "Synchronize all items" button, click the icon for advanced fetching. Hover over it to see the state: "Advanced fetching is disabled. Enable it if the fetched content looks incomplete." or "Advanced fetching is enabled. Dynamic pages are fetched with increased accuracy." A message confirms the change ("Advanced fetching enabled. A resync will start." or "Advanced fetching disabled. A resync will start."), and the source is synchronized again straight away. Click the same icon to switch it off.
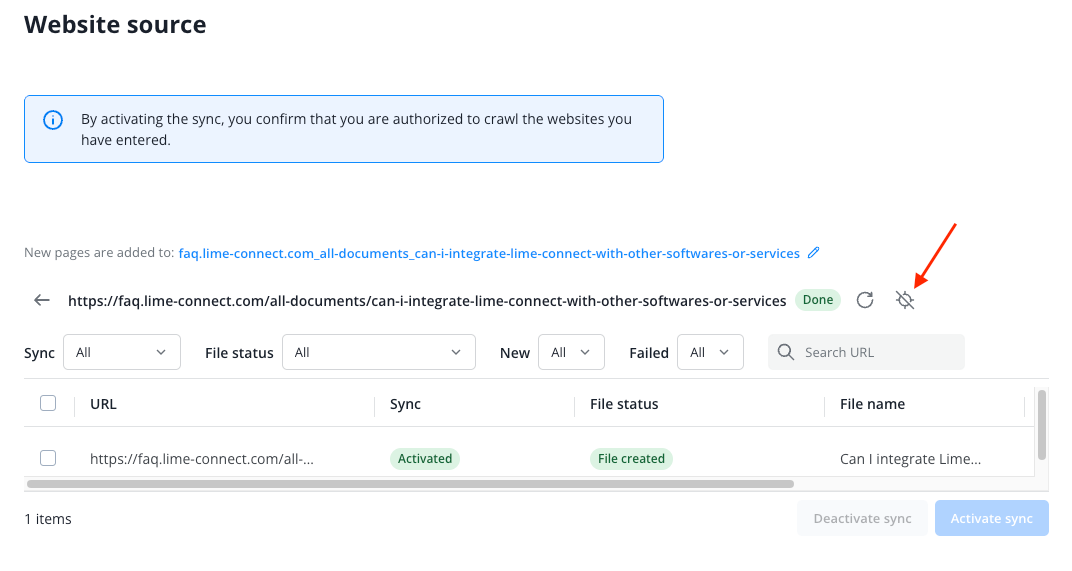
The overview of your external sources shows the state of each source in the "Advanced fetching" column: "On" or "Off". If you open an imported page from a source where advanced fetching is off, a hint says: "If the content looks incomplete, you can enable advanced fetching for this source to improve data extraction." Its link takes you back to the source.
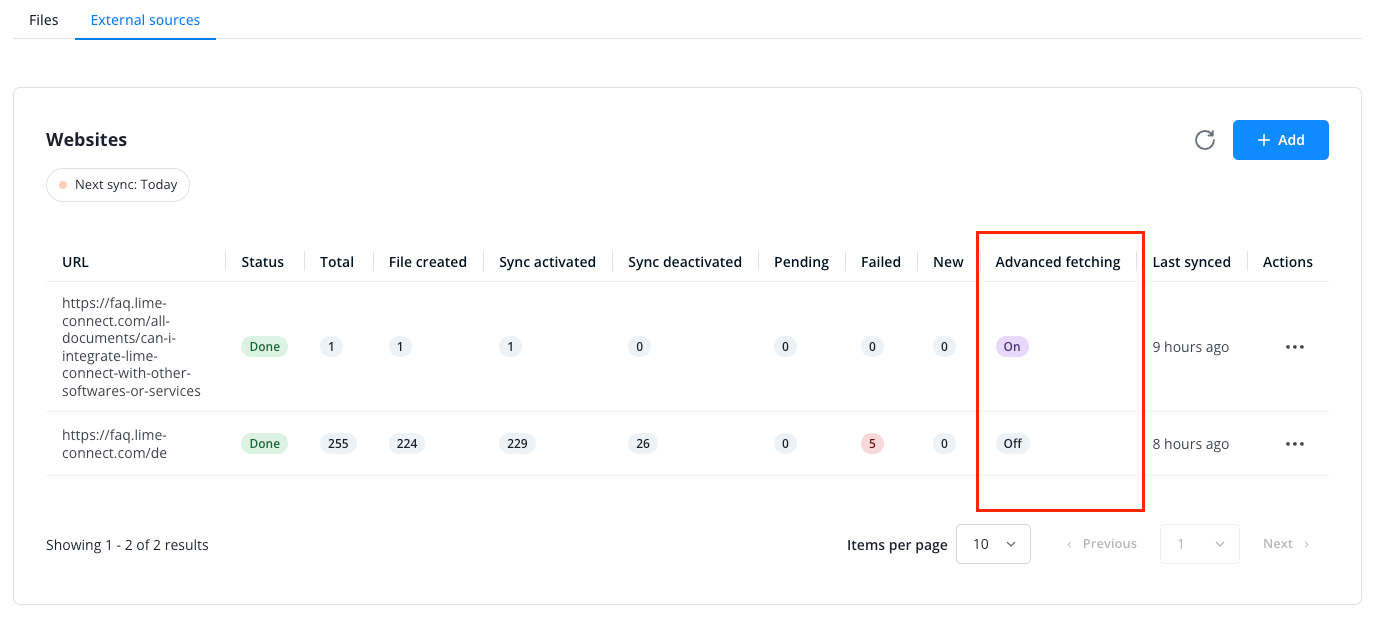
Lime Connect can also switch advanced fetching on by itself: when you add a source whose start page looks dynamic, or later when at least a fifth of the pages it fetches look dynamic. This does not happen for a source where you switched it off yourself. The source then shows "On" and is synchronized again.
Dynamic pages are fetched with increased accuracy using rotating IP addresses that we do not control, so allowing IP addresses in your firewall cannot let them through. If your website blocks visitors by IP address, switch advanced fetching off for that source. The crawler then comes from our IP addresses again, and support can give you the list at support@lime-connect.com.